What nails to use for baseboards? A detailed guide
Deciding on which size nails to employ for your work can be challenging due to the various size nails that are marketed. The length and kind of nail must all be taken into account while selecting the right one. This article provides proper guidance to help you make a beneficial decision as to what size nail to use.
You are surely aware of the issue with working with inappropriate nail size. A short nail won’t penetrate deeply enough to attach the trim the right way, whereas a very long nail runs the risk of separating the material and destroying everything in the assembly, together with wiring and plumbing.
What size nails do you use for baseboards?
Length
The letter D is typically used to indicate the length of the nail when it is measured in inches. A 2D nail is 1 inch, a 4D nail is 1.5 inches, and an 8D nail is 2.5 inches. A 0.25-inch difference in length results from each change in the number.
The baseboard nails shouldn’t be longer than 2.5 inches (8D) due to the baseboard’s thinness, with 1.5 to 2.5 inches being the perfect length.
The likelihood of running into an electrical line when hammering nails into a wall rises as the nail’s length does.
0.5 inches is long enough to penetrate a wall yet not exactly far enough to come in contact with an electrical wire.
Diameter
The nail gauge sizes represent a nail’s thickness or diameter. The gauge number rises as the nail becomes thinner. It also impacts the nail’s durability. The gauge size decreases as nail strength increases.
15 or 16-gauge nails work best for attaching baseboards. They are not too large to split the material, but they are sufficiently large enough to keep the baseboards in place. With the proper nail gun, you can use up to 18 gauge nails as long as you are dealing with thick baseboards.
Types of nails for baseboard trim
Nails that can simply be painted over and filled with a little wood filler to give the baseboard a clear, flawless appearance are the most suitable nails for baseboard trim. Nails come in a wide variety, each with a specific use and appearance.
They come in a range of lengths and gauges. You should take the size of the baseboard into account when deciding how many nails to use while installing baseboards. The categories of nails which are typically employed to nail a baseboard are as follows.
Brad nails
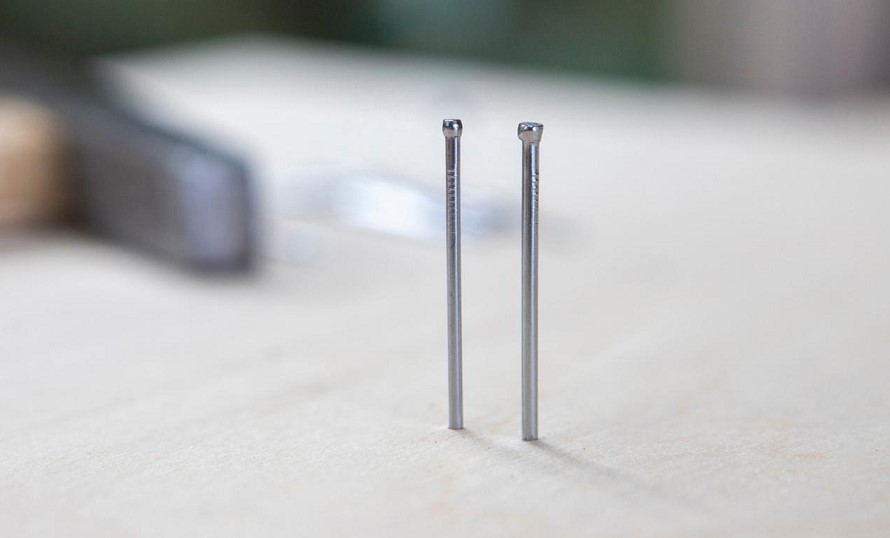
Brad nails are 18-gauge steel wire-based nails. They are more suitable for baseboard trim since they have a smaller diameter compared to other types of nails.
In addition to being thinner and smaller, they also have smaller heads. This won’t be noticeable in most places and will aid in preventing your wood from splitting.
Finish nails
Since finish nails are comprised of 15- or 16-gauge steel wire, they are very much thicker compared to brad nails. It has a greater grip because of the extra thickness. The length of these nails ranges from 1 to 3.5 inches.
They are the best choice when nailing heavily loaded baseboard trim. A 16-gauge nailer can shoot nails about 2.5 inches in length and is utilized for interior trim.
Efficient baseboard trim nailing options
The quickest way to install baseboards while being efficient is by using a nail gun. Yet, you may be unsure of the nail gun to work with. The best nail guns for baseboards are as follows.
Brad nailer
18-gauge nails are driven by a brad nailer. Smaller trim requires it because larger nails risk splitting the board.
Several specialists make use of them to fasten shoe molding base tops.
Because of their modest size, they are often utilized to cover up visible nails.
Despite brad nailers being frequently confused with finish nailers, they are not the same instrument.
Remember that these are shot with a brad nailer, and the maximum nail length that they can handle is “2”.
Because wire-like nails are less prone to damage delicate wood pieces, a brad nailer is suitable for tasks entailing extra precision, such as fastening small moldings.
Benefits and drawbacks
Benefits
- Nails end up leaving little holes requiring very little filling.
- Less prone to cracking fragile wood pieces.This product is suited for narrow trim and tiny moldings.
Drawbacks
- Lacks the ability to hold huge materials.
- It is unable to pierce hardwoods.
Finish nailer
A finish nailer is a versatile nail gun that is capable of driving 15- or 16-gauge nails. Instead of framing nails, they are utilized on projects like crown molding, baseboard trim, and decorative trim.
Finish nails are large enough to secure these more substantial parts yet compact enough to be concealed with putty for the finished result.
Benefits and Drawbacks
Benefits
- The ability to attach huge items.
- Capability to cut through thick plywood and hardwoods.
Drawbacks
- They can cause a significant nail hole that needs to be filled.
- They may split narrow molding and crack delicate trim pieces.
Pneumatic nailer
It is mostly employed because it is affordable and efficient. It uses pressured air to drive the nails. Be certain that the nail guns and the compressor’s air prerequisite are the same if you decide to work with them to guarantee proper function.
Benefits and drawbacks
Benefits
In as much as the compressor is connected to an outlet, you can carry on working.
Drawbacks
- Sometimes they can be noisy.
- Hoses can tangle with a variety of objects, including workbenches and doorways.
- Its weight can affect the arms during crown molding installment.
Finish nailer and a Brad nailer distinctions
After reviewing the fundamentals of the instruments, let us examine the distinctions between a finish nailer and a brad nailer.
Nail size
The primary distinction between a brad nailer and a finish nailer is the nail size utilized. Finish nailers employ bigger 15-gauge or 16-gauge nails compared to brad nailers which utilize thin 18-gauge nails.
Hole sizes
The size of the nail holes left by finish nailers and brad nailers is another distinction.
Finish nails leave big nail holes while brad nails leave little, virtually unnoticeable nail holes.
Precision
Brad nailers have a clear advantage in precision. They are the perfect size for delicate operations due to their compact size, and the little holes left behind.
Even though finish nailers are less accurate, they are ideal for nailing bulky items because they have larger diameter nails.

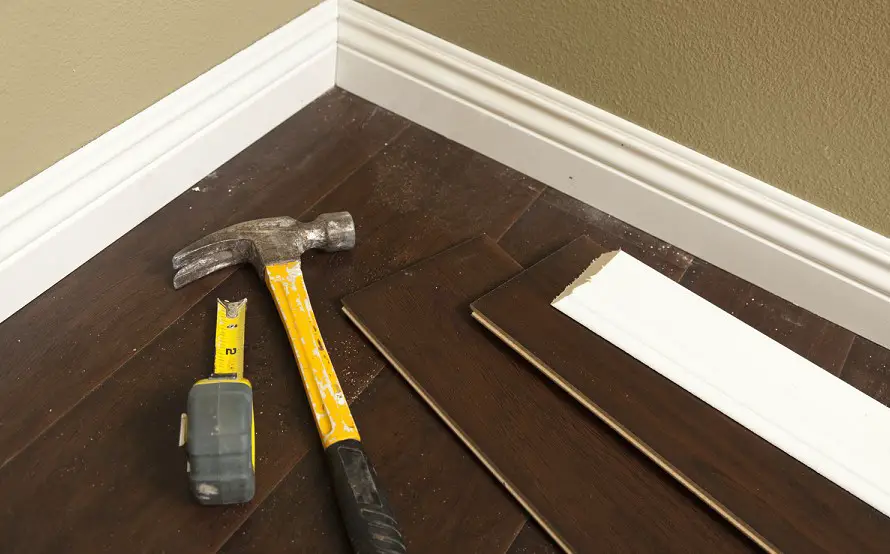
A guide to installing baseboards
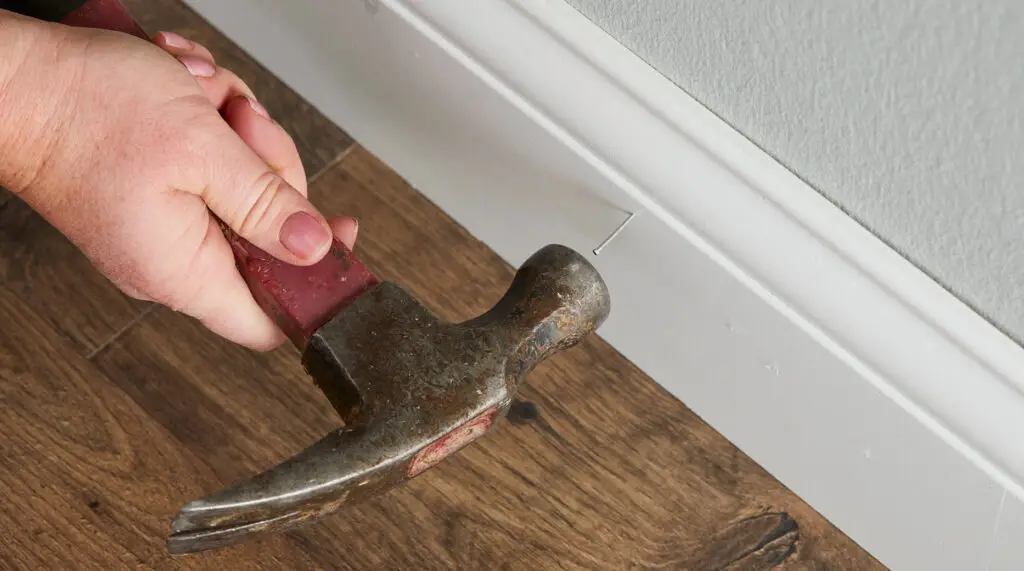
There are two major techniques for nailing baseboards. The baseboards can be anchored to the wall and driven through with a nail gun without eliciting damage. Without a nail gun, a hammer is employed to nail baseboards.
Even though the technique for nailing baseboards using a hammer is relatively the same, nails designed for that purpose with a wide range of dimensions to aid in inserting the nail into the wall need to be purchased.
Mark the studs
A few of the baseboard nails should enter studs as opposed to drywall by going all the way through the baseboard. To make this step of the procedure simpler, get a stud finder and slide it down the wall.
The stud finder will beep when it locates studs underneath the drywall. The placement of your studs will determine the distance at which you should nail baseboard.
The wall there should have a shred of baseboard trim attached. Make horizontal markings throughout the room using the top of the baseboard trim you nailed on as a guide.
When you locate a stud, mark it with a pencil in a small, light X above where you have nailed the baseboard with the first two nails. This ensures you see the location of the studs as you apply the remaining nails, allowing you to give priority to those places for nail placement.
Get your tool ready
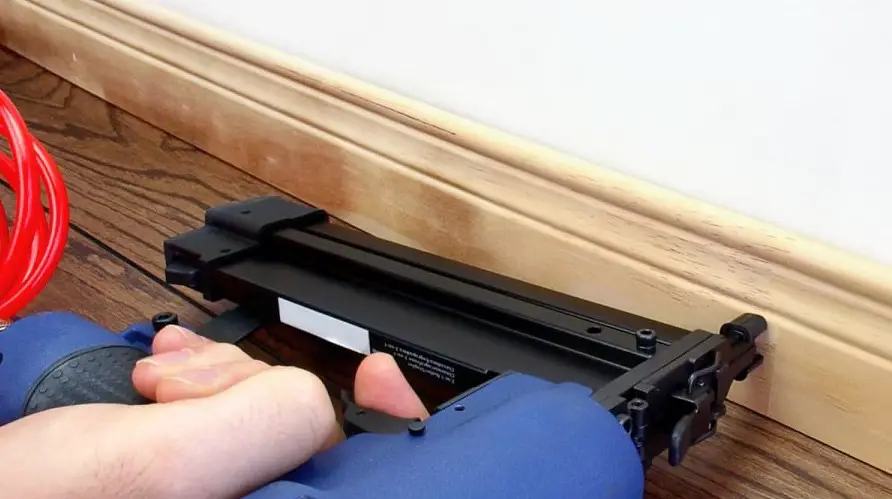
A compressor may be necessary when working with a nail gun. Make sure the nail gun’s battery is powered up and prepared to use before beginning.
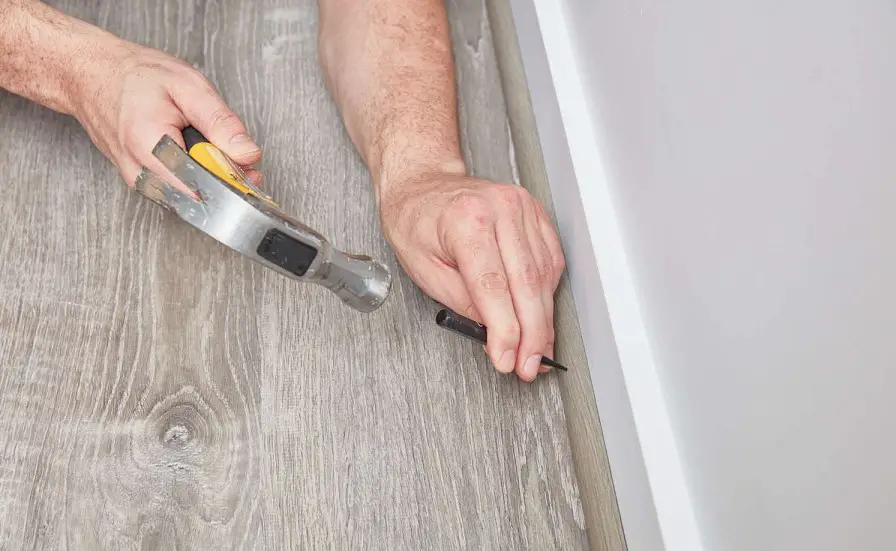
Be certain you have the appropriate nail set for your nails if you have intentions of using a hammer. Make the transition to the nailset immediately to prevent hammer dents on your baseboard.
Start work
Drive the nail directly into the baseboard below the penciled X lines. Paint or remove the marks after.
Follow the recommended instructions if you’re planning on using a pneumatic nailer.
Just place the nails in line alongside the studs when working with a hammer and properly nail to the end. To paint the nail beneath the baseboard with no traces left behind, use the nail set to reach it there. Also could be useful for you to read more about wall tile to baseboard transition.

FAQs:
A brad nailer and a finish nailer are often used to finish up projects rather than to construct them. They are separate tools that work similarly, therefore they are both finish nailers in that sense.
A brad nailer is more compact and lightweight compared to a finish nailer. It’s also simpler to get around in cramped quarters. Brad nailers use 18-gauge nails that are thinner and smaller in diameter than finish nails.
Finish nailers are ideally suited for heavy-duty applications. Finish nailers use 15- or 16-gauge nails that are larger in diameter compared to brad nails.
Always remember that the basic rule is that baseboard size nails shouldn’t exceed 2.5 inches. Finish nails with a thickness of 15 or 16 gauge and a brad nail with a thickness of 18 gauge are the most suitable for the task.
Baseboards can be attached using a brad nail. A finish nailer, on the other hand, might be a preferred alternative. Brad nails are thin, which is why they are ideal for fastening shoe molding or lightweight baseboard trim.
Finish nails have a larger diameter and greater stronger grip compared to brad nails, which is why they are the ideal choice for placing heavier baseboards.
There is no conclusive answer to this question because the size of finishing nails for baseboard varies according to the thickness of the baseboard. Install window casing with a 16-gauge nailer. They work well when nailing thinner baseboard trim.
Painting baseboard trim requires a 16-gauge nailer, while molding and baseboard trim requires a 15-gauge nailer. Fasten the drywall using a 15-gauge nailer.
Conclusion
Some folks still hammer their baseboard trim using a standard hammer. Nothing is wrong with that. However, if you have one hand free to keep the baseboard trim in place, it will be simpler to get it straight. Whichever option you select, be certain to work with the proper size nails.
Remember to take the necessary safety precautions. If you don’t follow the safety instructions or are inexperienced with using nail guns, they can be harmful. Wishing you success in your endeavor! We sincerely hope you found this information beneficial.
Read on site: Best Staplers for 50 Pages (2024)